Are you thinking about purchasing wood floor primer and topcoat, but you’re not quite sure if it’s worth it? Don’t worry, we’ve got you covered! In this guide, we’ll walk you through everything you need to know to get the best results.
Why Should I use a Primer & Topcoat?
Protection
A topcoat helps to protect the wood flooring from wear and tear, scratches, moisture, and other types of damage. It acts as a barrier between the wood and the environment, helping to extend the life of the flooring.
Aesthetics
A topcoat can enhance the appearance of the wood flooring by adding shine or depth to the wood grain. It can also help to maintain the colour and natural beauty of the wood over time.
Adhesion
A wood floor primer helps to improve the adhesion of the topcoat to the wood surface. It creates a bond between the wood and the topcoat, which helps to ensure that the topcoat adheres evenly and lasts longer.
Smoothness
A wood floor primer can also help to smooth out any imperfections or irregularities in the wood surface, which helps to create a smoother and more even surface for the topcoat to be applied on.
Simple Steps to Apply Wood Floor Primer & Topcoat
Get started
Applying a wood floor primer and topcoat can be a simple and straightforward process, giving you long-lasting results to enhance the beauty of your home. So, what are you waiting for? Start your next wood floor project today!
Step 1: Gather Your Materials
Before you begin, make sure you have all the necessary materials on hand. In addition to your wood floor primer and topcoat, you’ll need:
- Sandpaper or buffer
- A vacuum cleaner
- Roller (pole is optional)
- Paint tray
- Trowel
- Brush
- Safety glasses and gloves (optional, but recommended)
Step 2: Prepare the floor
Before applying the primer, it’s important to ensure that your floor is clean, dry, and level. If the floor is uneven, use sandpaper or a floor sander to level it out. Remove any dust, dirt, or debris from the surface using a vacuum cleaner.
Step 3: Apply the Wood Floor Primer
Once your floor is clean and level, it’s time to apply the wood floor primer. Firstly, open the wood floor primer and stir well with a clean trowel (you can shake it before opening too, but make sure to leave the lid on!)
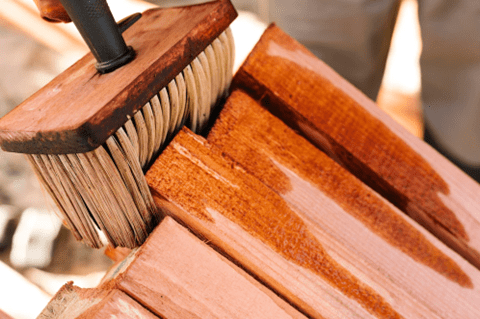
Apply the wood floor primer to a paint tray then apply to the skirting boards using a brush. Next, pour the wood floor primer across the middle of the floor and use a roller to spread it out evenly across the floor in an even, thin coat.
Work in small sections, overlapping each section slightly to ensure complete coverage. If there are any areas or edges hard to reach with the roller, use a brush to ensure everywhere is covered.
Step 4: Allow the Wood Floor Primer to Dry
After applying the wood floor primer, allow it to dry completely before proceeding. The drying time will depend on the temperature and humidity of your space, but generally, it takes 6-8 hours.
Be sure to follow the manufacturer’s instructions for specific drying times.
Step 5: Apply the Topcoat
Once the wood floor primer is dry, it’s time to apply the topcoat.
Shake well and pour the topcoat into a paint tray. Use a brush to apply the topcoat to the skirting boards.
Next, pour the topcoat generously into the centre of the floor, then use a roller to apply a thin, even coat to the floor.
Work in small sections, overlapping each section slightly to ensure even coverage. If there are any hard-to-reach areas or edges, use a brush to apply.
Step 6: Allow the Topcoat to Dry
After applying the topcoat, allow it to dry completely before continuing. The drying time will depend on the temperature and humidity of the area, but typically it’ll take around 6-8 hours.
Step 7: Sand or Buffer
If desired, you can lightly sand the wood floor primer using sandpaper to create a smoother surface.
Step 8: Clean the Floor
If you sanded or buffed the floor, next you’ll want to use a vacuum to thoroughly clean the dust and filings from the surface before the next step. If you didn’t sand or buffer, you may still want to vacuum the floor to ensure the surface is clean & clear.
Step 9: Final Topcoat
Finally, once the floor is clean, it’s time to apply the final topcoat. Once again, shake well before pouring the topcoat generously into the middle of the floor, then use a roller to apply a thin, even coat across the area. Wait a further 6–8-hour hours, then, voila! Your brand-new flooring is complete and should be looking beautiful.
Have you seen our product bundles?
Don’t forget our bundle deals, helping you on your way to get everything you need to sort the house out for summer! Shop bundles online.